How to Level Your Yard for Your New Shed
TL;DR: Before you build a garden shed, the ground underneath it matters more than most people think. This post explains why leveling your yard is so important, from keeping your shed stable to preventing water buildup and door issues. It also covers what can go wrong if you skip this step, especially with shifting, uneven settling and long-term damage.
We also walk through simple ways to level your yard step by step, plus a breakdown of common shed base options like gravel, concrete, pavers and wood frames. The main takeaway is that a flat, solid foundation sets your shed up for way fewer problems later and helps it last a lot longer.
So, you’re about to put up a new shed? Great! Sheds are a perfect addition to your yard, but before you start unpacking tools or hauling materials, there’s one thing you really don’t want to skip. That's leveling your yard. We know, we know ... it sounds kind of boring, but leveling the ground for your shed is actually super important. If your shed ends up on uneven ground, you’re probably asking for trouble. We’re talking about doors that stick, water collecting underneath or even damage down the road. Ick. No one wants any of that. The good news is that you don’t have to break the bank or call in a pro to get this right. In this post, we’re going to show you some easy and affordable ways to level your yard for your new shed. Whether you’re figuring out how to level the ground for a storage shed or just want the cheapest way to do it, we’ll walk you through it step by step. Let’s get your shed set up perfectly.
Why Leveling the Ground for Your Shed Is Important
Here's the thing: when you're learning how to level ground for a shed, you're not just doing busy work. There are some big reasons to do this right off the bat.
The first reason is stability and safety. Think about it: if your backyard shed is sitting on uneven ground, it can wobble around, much like a table with one short leg. Over time, this puts stress on the entire structure, which can lead to warped walls, cracked siding or even a complete collapse if things get really bad. When you take the time to properly level the ground for your shed, you're giving it a solid foundation that'll keep everything stable and secure for years to come.
Then there's the water issue, which is honestly one of the biggest problems with uneven ground. If your shed base isn't level, water will naturally flow toward the low spots and just sit there. This creates a perfect recipe for rot, mold and rust. So, basically, everything you don't want happening to your storage shed. Proper leveling ground for shed installation means water flows away from your shed instead of pooling underneath it, protecting both your shed and whatever you're storing inside.
And here's something that'll drive you crazy if you don't get it right: doors that won't open and close properly. When your shed shifts and settles on uneven ground, the door frame gets all wonky, and suddenly you're fighting with the door every time you want to grab your lawnmower. It's one of those things that seems minor until you're dealing with it every single day. Getting your ground level from the start saves you from this headache completely.
Can You Put a Shed on Uneven Ground?


You might be wondering, can you put a shed on uneven ground? The short answer is that it’s not a great idea. If you skip leveling the ground for your shed, especially on larger-sized sheds, you could run into some real problems down the road. Uneven ground means your shed won’t sit solidly, which can cause it to lean, shift or even weaken the structure over time. It might even void the warranty of your shed, if it has one.
If there’s any unevenness under your shed, the higher the risk of water pooling under your shed, doors not closing right or parts of your shed settling more than others, which can lead to cracks or damage.
It’s worth it to get a full ground leveling job. For most sheds, especially bigger ones or heavier models, taking the time to level your yard carefully will save you headaches and repairs later. It’s a small step that makes a big difference in the long run.
Step-By-Step Guide: How to Level Ground for Your Shed
Getting your yard ready to level ground for your shed doesn’t have to feel overwhelming. If you follow a few steps, you can have a solid, level base without too much hassle. Here’s a straightforward guide to help you get it done right.


- Clear the area: Start by removing grass, rocks and any debris. You want a clean space to work with so nothing gets in the way.
- Mark your shed’s footprint: Use stakes and string to outline where your shed will sit. While you want to know exactly where your shed is going, make sure to also add some space around the proposed shed site. This helps keep things neat and makes it easier to level the right area.
- Remove high spots: Dig down the raised parts with a shovel to start evening out the surface.
- Fill low spots: Add soil or gravel to any dips until the ground feels more level.
- Compact the ground: Use a tamper or even just your feet to stomp down the soil or gravel. This creates a firm, stable base on which your shed can sit.
- Double-check your level: Grab a carpenter’s level or stretch a string line across the area to make sure everything is nice and flat before you move on.
Taking your time on these steps means you’ll avoid problems later, like the things we mentioned; a shaky shed or doors that don’t close right. It’s worth the effort upfront to get your shed sitting perfectly level, so it stays safe and solid for years.
What Is the Best Base to Put a Shed On?
So, what’s the best base to put your shed on? Honestly, it depends on your yard, your shed size and what you want to use it for. But knowing the basics of each option makes the decision way easier.
Gravel Base


Gravel bases are super popular because they’re affordable and do a great job draining water away from your shed. If your yard gets wet or muddy, gravel’s a solid choice. It’s also pretty easy to level out. Just remember, over time, some gravel might move around, and you might need to add a little more here and there. It’s also important to note that using pea gravel or gravel smaller than 1/2" is important. Bigger gravel can affect the shed floor.
Concrete Slab


Looking for a shed foundation that's really sturdy and long-lasting? A concrete slab can’t be beaten. It gives you a rock-solid, flat surface, perfect for bigger or heavier sheds. Plus, it keeps moisture from creeping in underneath. The catch? It costs more and takes some time to pour and cure.
Pavers

Pavers can be a good pick, especially if you want your shed base to look nice or even double as a little patio space. They’re pretty simple to put down and stable enough for smaller sheds. Just keep in mind they need a good base underneath, or they might settle unevenly over time.
Wooden Frame Base


And if your yard is uneven or sloped, a wooden frame base might be your best bet. It lifts the shed off the ground, helping air circulate and keeping things dry. Wooden bases are quicker to set up but do need some upkeep so they don’t rot or get bugs.
At the end of the day, the best base is the one that fits your shed, your yard and your budget. Whatever you pick, just make sure it’s solid and level. That way, your shed will stay safe and sturdy for years.
Final Tips for Leveling Ground for Storage Shed Success
Once your shed is sitting on level ground, it's important to keep an eye on it. Regular maintenance is key to keeping things steady over time. Check around your shed every few months for signs that the ground might be shifting.
If you notice your shed leaning or the doors aren’t opening and closing smoothly, that’s a good sign your base might need re-leveling.
Leveling the ground properly before you set up your shed isn’t just about making it look good, it actually saves money down the road. As we’ve mentioned, a stable, level base helps your shed last longer and keeps repairs to a minimum. So, you get the most out of your investment without surprises.
Take your time with leveling your shed. Doing it right now means you’ll avoid problems down the road and keep your shed looking and working great for years.
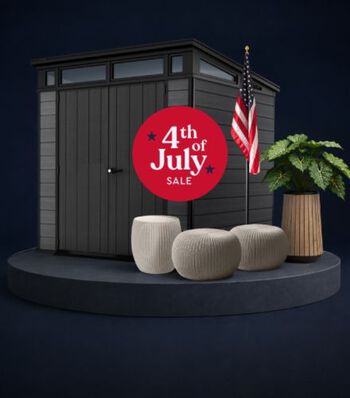
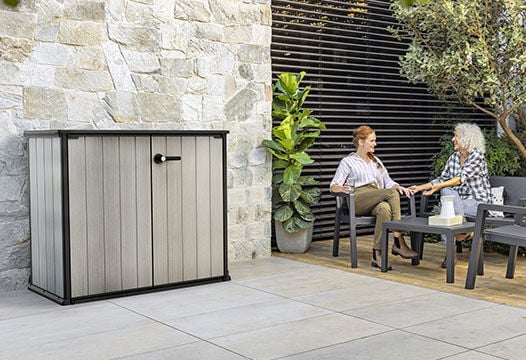
And when you’re ready to pick out your new shed, take a look at Keter’s storage sheds. They’re made from a durable resin that’s weather-resistant and requires little to no maintenance..


Purchase now
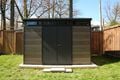
Stronghold 10x8 Storage Shed - Graphite
Extra Wide Double-Doors | Free Shipping
Extra Wide Double-Doors | Free Shipping


We build in a sustainable manner.
We use innovative materials and leading technologies to build planet-friendly products that last a lifetime.