How To Build a Ramp For Your Storage Shed
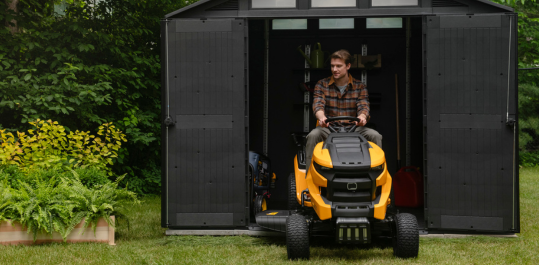
Getting heavy equipment in and out of a storage shed can be more of a workout than you bargained for. Lifting a lawnmower, wheelbarrow, or snowblower over a shed threshold isn’t just awkward. It’s really tough on your back and your gear. That’s where a shed ramp can really help. With the right ramp, you can roll equipment straight into your storage space without bending, straining, or risking scratches on your shed floor.
In this blog, you’ll learn exactly how to build a ramp for a shed, from choosing materials and calculating the right slope to simple step-by-step construction tips. Whether you’re planning a DIY ramp or using an alternative, this guide will make sure you have a safe, sturdy, and practical ramp that you can use all year round.
Why Your Shed Needs the Right Ramp
A sturdy ramp isn’t just a convenience, it’s a way to protect your back, your equipment, and your shed floor. Trying to muscle a lawnmower or wheelbarrow over a threshold can scratch the shed, damage your tools, or leave you with sore muscles. A well-built ramp takes the strain out of moving things in and out, turning that awkward lift into a smooth roll. Not all ramps are built the same, and details like slope and materials matter.
Most Keter sheds come with slightly sloped floors that help ease the transition, but if your shed doesn’t have one, adding a ramp is a simple way to make access easier. A permanent ramp offers a long-term solution that’s always ready to use, while a portable option can be stored away when space is tight. Taking a little time to plan before building a ramp for a shed ensures it will fit your space, protect your shed, and make everyday tasks far more manageable.
Planning Your Ramp: Slope, Size, and Purpose

Planning ahead makes a big difference when learning how to build a storage shed ramp. The design depends on what the ramp will be used for and how often it will see traffic. A small push mower or wheelbarrow won’t need the same strength and size as a heavy riding mower or equipment that’s rolled in daily. Thinking about the weight and frequency of use helps guide the rest of the choices.
The slope is another key detail. A ramp that’s too steep can make it hard to push equipment safely. So, what slope should a shed ramp be? A good rule of thumb is a gentle incline, but it really depends on your shed height from the ground.
Choosing Materials: Wood or Metal
Picking the right material makes a big difference when building a shed ramp. Wooden ramps are the classic choice for DIY projects. They’re budget-friendly, easy to customize, and they work well for most garden equipment. Using pressure-treated lumber adds durability and helps the ramp withstand rain, sun, and snow, so it stays safe and sturdy for years.
Metal ramps, like aluminum or steel, are another option. Aluminum ramps are lightweight, rust-resistant, and easy to move around if needed. Steel ramps offer extra strength for heavier equipment, though they can be harder to reposition and usually cost more. Both options require less long-term maintenance than wood, which can be a big plus if the ramp sees frequent use.
When choosing materials, it’s important to consider your shed type. Most Keter resin sheds have slightly sloped floors, so the ramp needs to match the threshold for a smooth transition. So, you may not need a ramp, even. Think about how heavy your equipment is and how often you’ll use the ramp. This will guide whether a wooden or metal ramp makes the most sense. A carefully chosen material keeps your ramp safe, durable, and easy to use every day.
How to Build a Simple Wooden Ramp for Your Shed
Building a wooden ramp can be a straightforward weekend project, even for beginners. With a little planning and the right tools, it’s possible to create a ramp that’s safe, sturdy, and perfect for moving equipment in and out of your shed.


Step 1: Measure and Plan the Ramp
You’ll need to start out by planning what you’d like your ramp to look like. Then you need to measure twice to make sure there are no errors before starting your project.
Step 2: Gather Your Tools & Materials
Start by collecting everything you’ll need: a saw, drill, screws, a level, measuring tape, and lumber. Having all the tools on hand makes the process smoother and keeps the project from dragging out.
Step 3: Build the Frame (Joists)
You’ll need to do a bit of math to get the correct measurements. Then you’ll need to cut the side joists to match your ramp’s length and angle. Make an angled cut where the ramp meets the ground so equipment rolls on smoothly. Secure the joists together with cross supports to create a strong frame that can handle foot traffic and garden tools.
Step 4: Attach the Ramp to Your Shed
Use fasteners suitable for the shed material, and make sure the ramp sits flush against the threshold without forcing it into place. A properly attached ramp keeps your shed floor safe and prevents wobbling when in use.
Step 5: Install the Decking
Lay the top planks across the frame, leaving small gaps for drainage. This can help to prevent water from pooling and keeps the ramp from becoming slippery. Decking completes the main structure of the ramp, turning it into a functional ramp for a shed or part of your storage building ramps.
Step 6: Add Safety Features
Finish with anti-slip tape, a textured surface, or a weather-resistant finish. These simple touches make the ramp safer in wet conditions and help protect both the ramp and equipment over time.
This is a very simplified version of the steps, but it’s the basic gist. If you are unsure of what to do, or have never built a ramp before, it might be good to hire a professional or at least talk to someone who has experience. Here's a more detailed video on ramp building to get you started.
Alternative Option: Portable Shed Ramps
For those who don’t need a permanent solution, a portable shed ramp might be a convenient option. These ramps are easy to move, store, or set up only when needed, making them ideal for renters, seasonal use, or situations where space is limited.
Pre-made aluminum ramps are the most common type. They’re lightweight, rust-resistant, and strong enough for wheelbarrows, small lawn equipment, or a push mower. Keep in mind, though, that most portable ramps are designed with lighter loads in mind. They’re often used for accessibility, like wheelchairs, so they may not be sturdy enough for heavier garden equipment without careful planning.
A portable ramp can be a practical choice for a small ramp for a shed or temporary access, but use at your own risk. It’s important to do your research and match the ramp’s weight capacity to the equipment being used. This ensures safety while keeping the ramp easy to handle and store. Using this option thoughtfully can make everyday shed tasks much simpler without committing to a permanent build.
Common Ramp Mistakes to Avoid


So, what are common shed ramp mistakes? Knowing them can save you a lot of headaches and keep your ramp safe for years. One frequent error is making the slope too steep. Steep ramps are harder to use, especially in wet weather, and increase the risk of equipment tipping or slipping.
Weak or improperly spaced joists are another problem. They can cause the ramp to sag or wobble under weight. Using warped or damaged boards, or cutting corners with DIY shortcuts, can also compromise safety and lead to costly repairs.
Proper planning, quality materials, and careful assembly prevent most of these issues. Making sure the ramp is securely attached, evenly supported, and built with strong, straight boards creates a ramp that’s both safe and long-lasting. Paying attention to these details turns your DIY project into a reliable ramp for a shed that’s easy and safe to use every day.
Maintenance Tips for Longevity
Keeping ramps for sheds in good shape doesn’t have to be complicated, and a little regular care goes a long way.
- Start by checking screws, bolts, and other hardware to make sure everything stays tight and secure.
- Inspect the boards for cracks or warping and clean off moss, algae, or debris that can make the surface slippery.
- Seasonal care is important too: clear snow and ice promptly, and be mindful of heavy rain that can pool on the ramp. Consider sealant for wood ramps.
A few simple steps like these can help keep your ramp safe, stable, and functional for years. Regular attention ensures rolling equipment in and out of your shed remains smooth, easy, and worry-free all year round.
A well-planned ramp makes using your shed safer, easier, and more enjoyable. From choosing the right slope and materials to keeping your ramp in good condition, a little planning goes a long way. Whether building a permanent wooden ramp or opting for a lightweight metal option, following these tips ensures smooth access for your tools and equipment year-round.
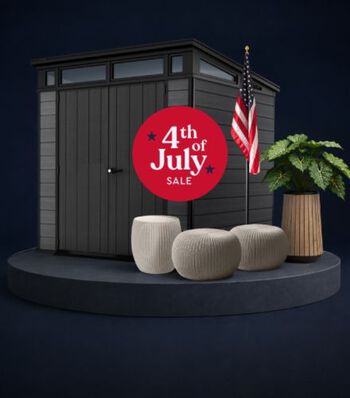
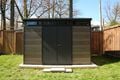
For anyone ready to take their storage solution to the next level, a Keter resin shed is a smart choice. Durable, weather-resistant, and designed for easy setup, Keter sheds provide a solid foundation for your ramp and keep your equipment protected.
Explore our range of storage shed kits today and create a setup that’s both practical and long-lasting.
Frequently Asked Questions
Shed Ramps
What is the best material for a shed ramp?
What are common shed ramp mistakes?
How much does it cost to build a shed ramp?
Are shed ramps easy to install?


Purchase now
Newton Plus 7.5x17 Storage Shed - Graphite
Door Installs on Either Side | Free Shipping
Door Installs on Either Side | Free Shipping


.jpg?sw=120)
.jpg?sw=20 "Do Sheds Need a Base? The Shed Foundation Dilemma")

We build in a sustainable manner.
We use innovative materials and leading technologies to build planet-friendly products that last a lifetime.