DIY Guide: Building Your Shed in a Weekend
TL;DR: Building a shed in a weekend is totally doable when you’ve got a solid plan and a kit that’s designed to be simple from the start. It really comes down to picking the right spot, making sure the ground is level and clearing the area properly so you’re not fighting the setup later. Once that’s done, everything else moves a lot smoother than most people expect. From there, it’s just following the instructions step by step, assembling the base, walls, roof and door, then finishing things off with the details that make it functional. Adding shelving at the end helps turn it from an empty box into a real storage setup that actually works for your stuff. By the time you’re done, you’ve got a sturdy, organized shed without dragging the project out for weeks.
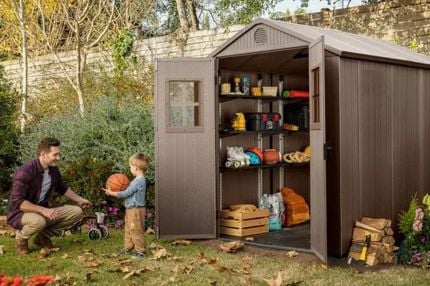
Are you looking to add extra storage space to your yard without the hassle of traditional construction? Look no further! Keter storage shed kits offer the perfect solution with their durable, low-maintenance, and weather-resistant resin sheds. Designed to withstand the elements, these sheds will not rot, rust, or peel, ensuring they remain a reliable and attractive feature in your yard for years to come.
Even better, Keter sheds come as easy-to-assemble kits with clear, straightforward instructions, making them an ideal weekend project for any DIY enthusiast. In this guide, we'll walk you through each step of the process, from selecting the best spot in your yard to putting the finishing touches on your new shed.
Step 1: Select a Part of Your Yard for Your Shed
The first step in building your Keter shed is selecting the perfect spot in your yard. When choosing a location, consider factors such as
- Level ground
- Proper drainage
- Easy accessibility
A level surface is crucial for the stability and longevity of your shed. At the same time, good drainage will help to prevent water from pooling around the base, protecting your shed from potential damage. Ensure the location is convenient for accessing tools and equipment, but also consider how the shed will fit into the overall layout and aesthetics of your yard.
Before you start any groundwork, you must check local regulations and property lines. Some areas have zoning laws or homeowners' association rules that dictate where to place a shed. Ensuring your shed is within your property lines and complies with local regulations will save you from potential fines or the need to relocate your shed later. Taking these initial steps will set a strong foundation for your project, ensuring a smooth and hassle-free assembly process.
Step 2: Clear the Area for Your Storage Shed
Once you've chosen the ideal spot for your Keter shed, it's time to prepare the area. Start by removing any debris, plants and other obstacles from the site. This includes rocks, roots and any existing structures that might interfere with your shed's foundation. A clean, clear space will make the assembly process much smoother and ensure a stable base for your shed.
Next, focus on leveling the ground. A level foundation is really important for the structural integrity of your shed. Use a shovel to even out high spots and fill in low areas. For larger areas, consider renting a tamper or plate compactor to ensure the ground is compacted and firm. This will prevent shifting or settling over time. Taking the time to prepare the ground properly will provide a solid foundation, making the rest of the assembly process straightforward and ensuring your shed stands strong for years to come.
Step 3: Review Your Keter Shed Kit Instructions

Before assembling your Keter shed, it's important to thoroughly review the instruction manual. Reading through the entire manual before starting ensures you understand the assembly process from start to finish. This preparation helps you anticipate each step, reducing the risk of mistakes and making the overall project more efficient and enjoyable!
Your Keter shed kit comes with panels for the walls, roof and floor, as well as all necessary hardware. The instruction manual offers a detailed overview of each part, so take the time to familiarize yourself with these components. Understanding how each piece fits into the overall structure will streamline the assembly process.
Before you begin your shed building, you must check the inventory to ensure all parts are present. Lay out all the components and compare them with the parts list in the manual. If any pieces are missing or damaged, contact Keter's customer service for replacements. Verifying your inventory upfront will save you from unexpected delays and frustrations, setting you up for a smooth and successful shed-building experience.
Step 4: Gather Your Tools for Shed Building
With your site prepared and instructions reviewed, it's time to gather your tools. To assemble your Keter shed, you'll need some basic tools: a screwdriver, hammer, level and drill. Additionally, a rubber mallet and a step ladder can be incredibly helpful, making it easier to fit panels together and reach higher areas. Set up your workspace with all these tools within easy reach to ensure a smooth workflow. Having everything organized and ready to go will keep the assembly process efficient and enjoyable, allowing you to focus on shed-building without unnecessary interruptions.

Step 5: Assemble the Base and Floor
Now that you have everything in place, it's time to assemble the base and floor of your Keter shed. Start by laying out the base on your prepared ground. There are several different kinds of shed bases, including:
- Gravel Base: This involves leveling the ground and laying down a thick layer of compacted gravel. It provides stability and drainage. Suitable Conditions: This method is cost-effective and ideal for areas with heavy rainfall.
- Concrete Slab: Concrete is poured into a prepared frame to create a solid and level foundation. It offers exceptional durability and protection. Suitable Conditions: Long-term use; provides excellent moisture protection.
- Wooden Piers: Involve setting treated wood posts into the ground to support the shed. Suitable for uneven terrain and relatively easy to construct. Suitable Conditions: Work well on uneven ground and provide a sturdy support system.
- Plastic Shed Base Kits: Consists of interlocking plastic grids filled with gravel or soil. They offer stability and permanence.
If you’d like more information on bases, we discuss the base types mentioned above in our blog Do Sheds Need a Base? Also, ensuring the base is level is critical—use a level to check as you go, making adjustments as necessary. A stable and level base will provide a strong foundation for the rest of the shed, preventing issues down the line.
Once the base is completed, it's time to attach the floor panels. Align the panels carefully according to the instructions and use the provided hardware to fasten them securely. Make sure each panel is properly seated and locked into place. This step is crucial for creating a solid floor that can support the weight of stored items and withstand daily use. Taking the time to do this right will ensure your shed is sturdy and ready for the next stages of assembly.
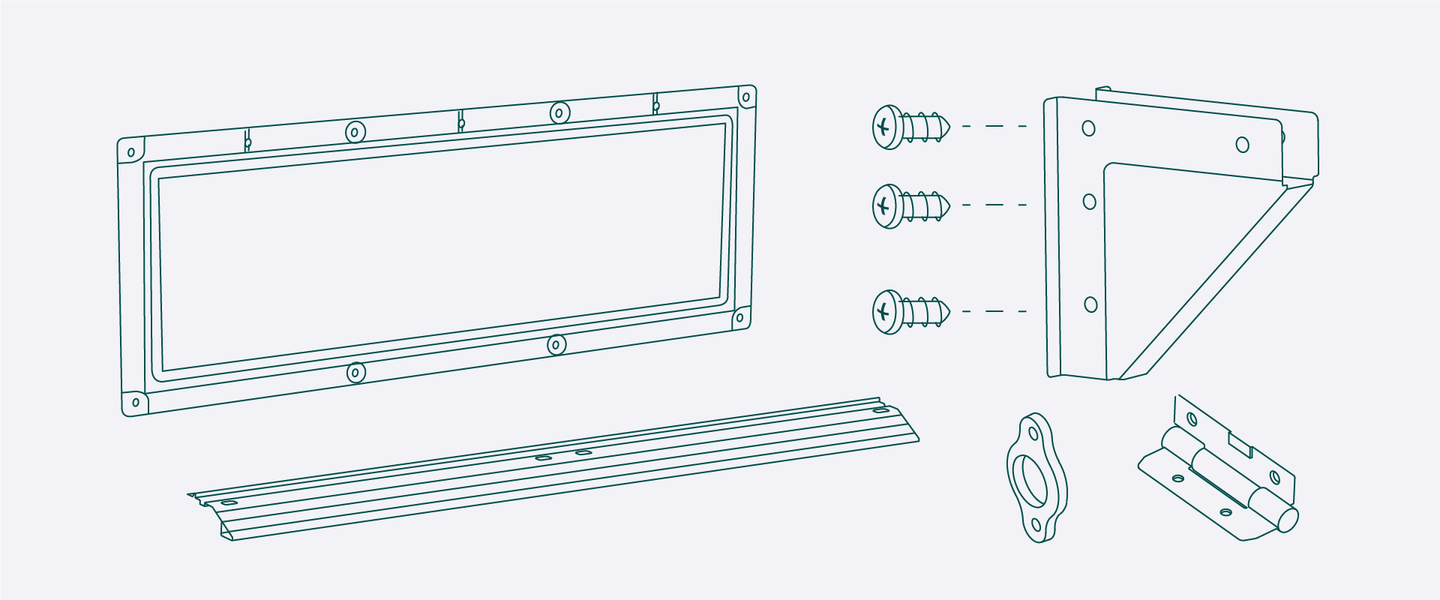
Step 6: Shed Building (Walls, Roof, Door, etc.)
With the base and floor in place, it's time to bring your Keter shed to life by assembling the walls, roof, door and more. Follow the detailed instructions provided in your manual for assembling the walls. Carefully connect each panel, ensuring a snug fit and using the recommended hardware to secure them together. Take your time to align the panels properly, as this will ensure a sturdy and weather-resistant structure.
Once the walls are assembled, it's time to secure them to the base. Follow the instructions to attach each wall securely, ensuring they are level and properly aligned. Next, install the windows and roof panels according to the provided guidelines. Pay close attention to ensure a tight seal between panels, preventing any potential leaks.
Finally, attach the door and make sure it aligns properly with the door frame. If needed, adjust hinges or latch mechanisms for a smooth operation. When handling large panels, consider enlisting the help of a partner for ease and safety. Working together, you can ensure each component is installed correctly, resulting in a professionally built shed ready to serve your storage needs for years to come.
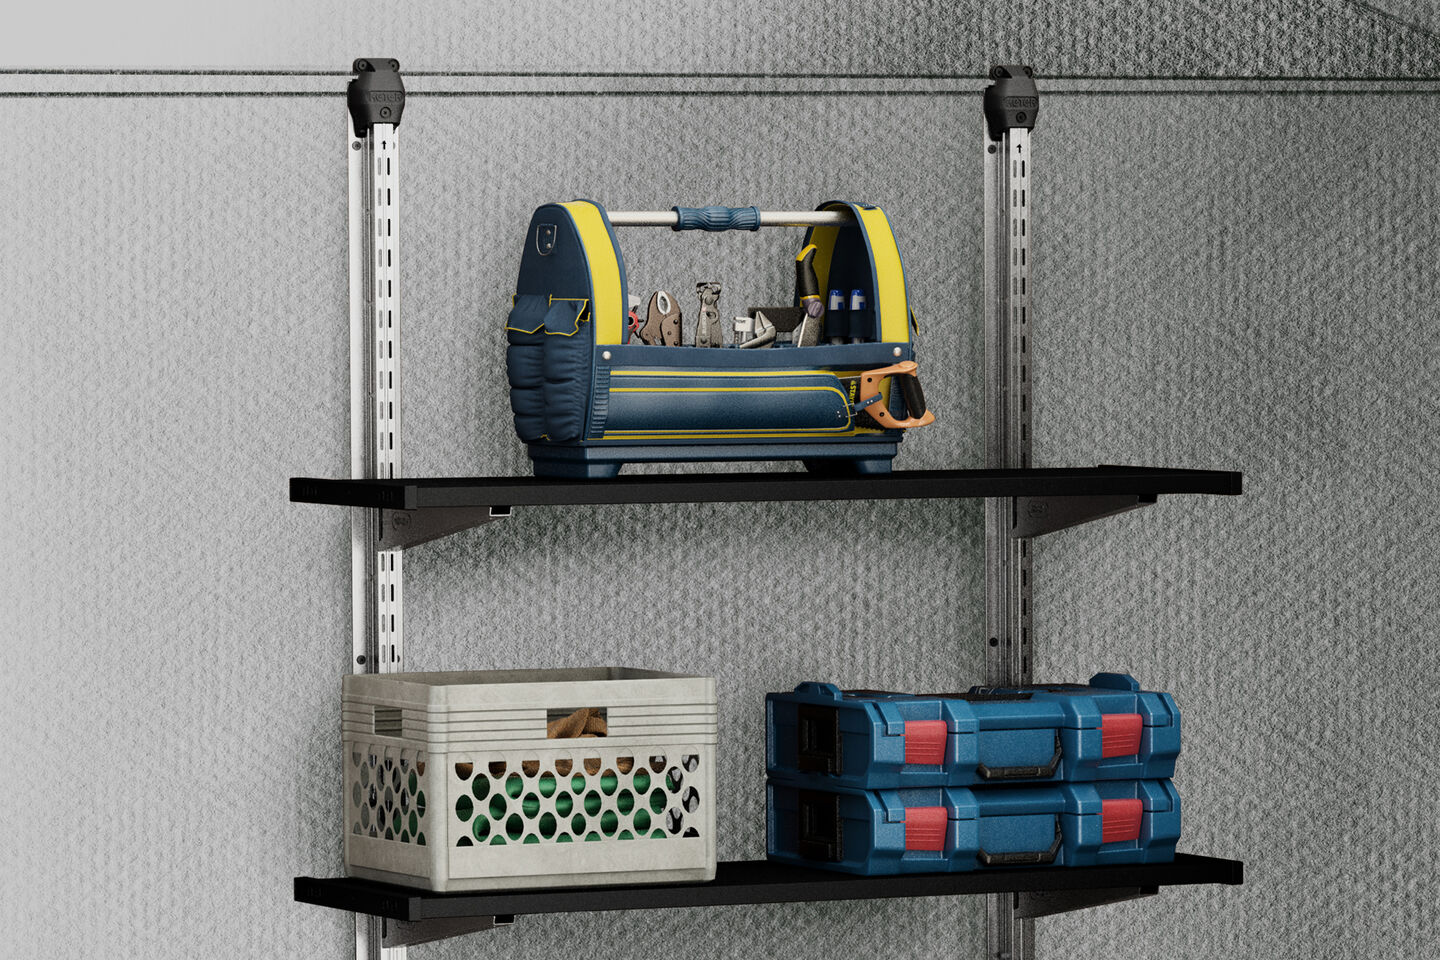
Step 7: Add in Shelving Kits

Now that your Keter shed is assembled, it's time to maximize its storage potential with shelving kits. Keter offers a durable shelving option designed to fit seamlessly into your shed, providing additional organization for tools, gardening supplies and more. Begin by selecting the shelving kit that best suits your needs and the layout of your shed.
Once you've chosen your shelving kit, follow the step-by-step guide provided to install it securely inside your shed. Start by positioning the shelves at your desired height, ensuring they are level and properly anchored to the shed walls.
Additionally, consider adding a wall mount tool organizer or a wall mount bike rack to help maximize vertical space and keep frequently used items within easy reach. By effectively utilizing shelving kits, you can transform your Keter shed into a well-organized storage solution that helps you make the most of your outdoor space.
Keter sheds offer a winning combination of durability, low maintenance and weather resistance that makes them a standout choice for any outdoor storage solution. Crafted from high-quality resin, these sheds are built to withstand the elements, ensuring they won't rot, rust or peel over time. Additionally, their easy-to-assemble shed kits come with straightforward instructions, making the construction process a breeze. With a Keter shed, you can enjoy the convenience of extra storage space in your yard without the hassle of traditional construction. Say goodbye to clutter and hello to a tidy, organized backyard with your new Keter shed—designed to last and ready to serve your storage needs for years to come.


We build in a sustainable manner.
We use innovative materials and leading technologies to build planet-friendly products that last a lifetime.