
DIY Guide to Building Your Shed in a Weekend
TL;DR: Keter shed kits make adding storage to your yard simple and stress-free. Start by picking a level, well-drained spot and clear the area for a solid base. Review the instructions, gather basic tools and assemble the floor, walls, roof and door carefully. Add shelving or wall organizers to make the most of your kit garden shed. These prefab sheds are weather-resistant, low-maintenance and built to last, giving you a practical and attractive storage solution without the hassle of traditional construction.
Looking to add extra storage to your yard without taking on a big construction project? Keter shed kits make it simple. These durable, weather-resistant resin sheds are built to last—they won’t rot, rust or peel, so your shed stays looking good and stays functional for years.
Keter’s kit garden sheds come with everything you need for a smooth build, including clear instructions that make it easy to tackle as a DIY shed project over a weekend. In this guide, we’ll cover every step of building a shed: from picking the right spot in your yard to finishing touches that help your shed look great and stay sturdy. By the end, you’ll have a strong, practical and attractive storage solution ready to go.
Step 1: Pick the Right Spot for Your Shed

Choosing the right spot in your yard is an important first step when planning to build a shed. A few key things to keep in mind will make a big difference in how your shed performs and how long it lasts. Look for an area that has:
- Level ground – This keeps your shed stable and prevents it from leaning or shifting over time.
- Good drainage – Water pooling around the base can cause damage, even with weather-resistant sheds, so pick a spot where rain will run off easily.
- Easy access – Make sure it’s convenient for reaching tools, garden equipment or whatever you plan to store.
It’s also important to check local rules before any groundwork starts. Zoning laws, property lines and homeowners’ association regulations can affect where you’re allowed to place a shed. Taking the time to make sure your shed fits within your property and meets all local requirements will save headaches later.
Planning the location carefully sets the stage for a smoother DIY shed build and helps ensure your kit garden shed looks great and functions well in the yard for years to come.
Step 2: Clear the Area for Your Storage Shed
Once the spot for the kit garden shed is chosen, the next step is getting the area ready. Start by removing anything that could get in the way—rocks, roots, plants or old structures. Clearing the space not only makes assembling your shed easier but also helps create a stable foundation that will keep it sturdy for years.
After clearing the area, focus on making the ground level. A solid, even base is key to the long-term stability of a prefab shed. For small spots, a shovel or rake can do the job. For larger areas, renting a tamper or plate compactor can make sure the soil is firm and won’t shift over time.
Taking the time to properly prepare the ground makes the rest of the shed-building process much smoother. With a level, solid foundation in place, assembling your DIY shed will be simpler and faster. The result will be a shed that stands strong and looks great for years to come.
Step 3: Go Through Your Keter Shed Kit Instructions


Before starting to build a shed, it helps to read through the instruction manual from start to finish. Doing this gives a clear picture of each step, making the whole DIY shed process smoother and helping avoid mistakes along the way.
Your Keter shed kit includes all the panels for walls, roof and floor, along with the hardware needed to put it together. Take a few minutes to get familiar with each piece and see how everything fits together. Knowing what goes where before you start makes assembling a prefab shed much easier.
It’s also important to check that all parts are included and in good condition. Lay out everything and compare it to the parts list in the manual. If anything is missing or damaged, contact Keter right away for replacements. This quick check ensures a smoother kit garden shed build and helps the project stay on track from start to finish.
Step 4: Gather Your Tools
With the area ready and instructions reviewed, it’s time to get your tools together for building a shed. Most Keter shed kits only need basic tools, like a screwdriver, hammer, level and drill. A rubber mallet can help fit panels snugly, and a step ladder makes reaching the roof or upper panels much easier.
Setting up your workspace with everything close at hand makes the DIY shed build go smoothly. Having tools organised and ready saves trips back and forth, keeps the project moving along and makes assembling a kit garden shed more enjoyable.
Taking a few minutes to prepare your tools upfront sets the stage for a stress-free build. Once everything is at the ready, putting together your prefab shed becomes straightforward, leaving more time to enjoy a finished, functional space in the yard.
Step 5: Assemble the Base and Floor
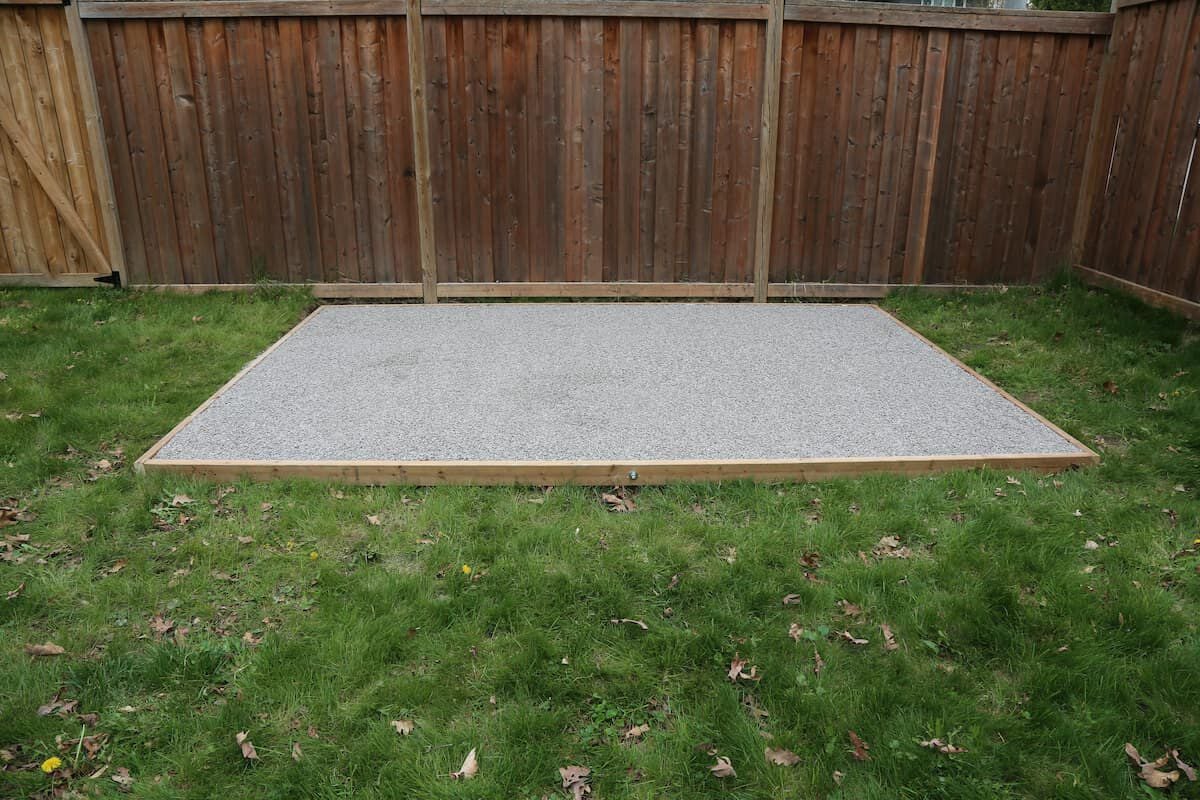

With the site prepped and tools ready, it’s time to set up the base for your kit garden shed. A solid, level foundation is key to a strong and long-lasting shed. There are a few common options for shed bases:
- Gravel Base: Level the ground and spread a thick layer of compacted gravel. It’s stable, drains well and works great in areas with heavy rain.
- Concrete Slab: Pour concrete into a prepared frame for a solid, level foundation. This option is durable and keeps moisture away from the shed floor.
- Wooden Piers: Treated posts set into the ground provide a sturdy base, especially on uneven terrain.
- Plastic Shed Base Kits: Interlocking plastic grids filled with gravel or soil create a stable, long-lasting foundation.
Using a level to check your base as you go is important—any uneven spots can affect the DIY shed structure later. Once the base is ready, the floor panels can be installed. Follow the instructions to align each panel carefully and secure them with the provided hardware. Properly seated panels create a solid floor that can handle daily use as well as the weight of your tools, garden supplies or storage items.
Taking the time to build a strong, level base ensures the rest of your prefab shed assembly will go smoothly and leaves you with a shed that’s sturdy, safe and ready for years of use.
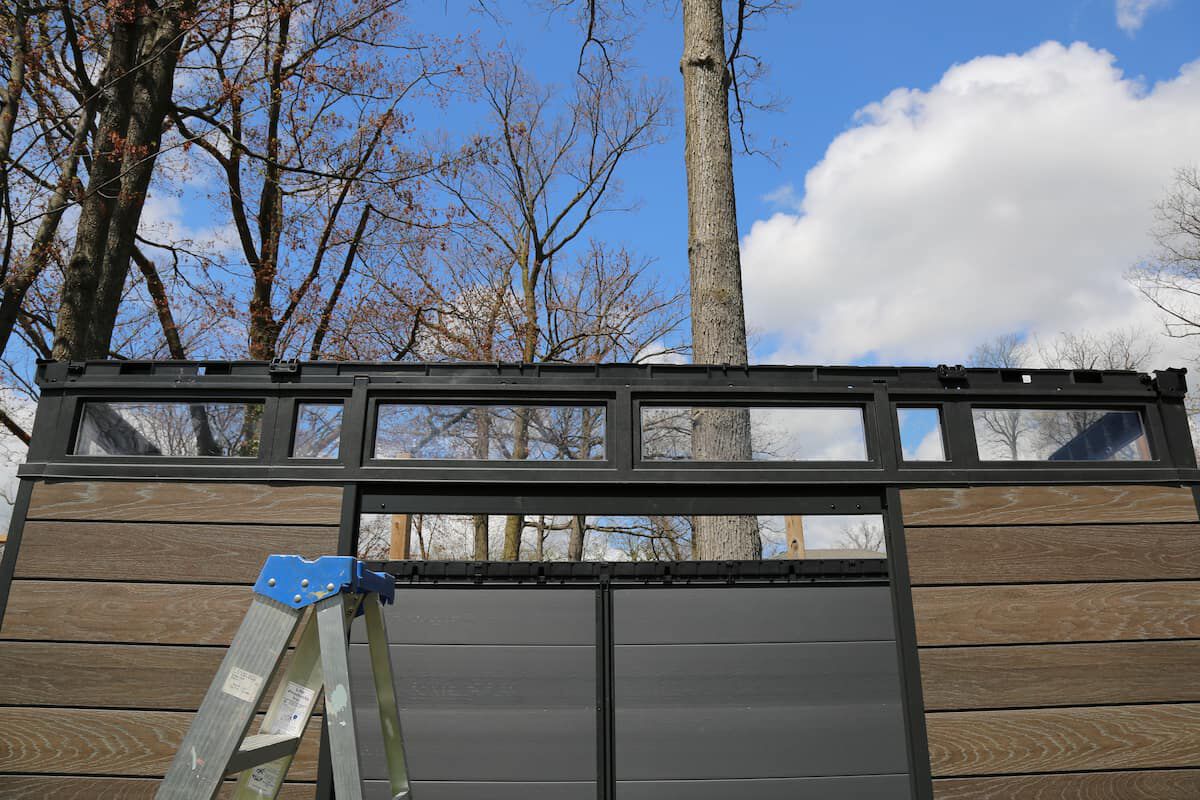
Step 6: Build the Walls, Roof and Door
With the base and floor in place, it’s time to start building your shed. Begin by assembling the walls, following the instructions in your manual. Connect each panel carefully, making sure everything fits snugly by using the recommended hardware. Taking your time to line up the panels properly helps create a sturdy, weather-resistant prefab shed that will last for years.
Once the walls are set, attach them securely to the base and check that they’re level and straight. Next, install the roof panels and any windows according to the guide, paying attention to the seals so no water can get in.
Finally, fit the door and make sure it opens smoothly. Adjust hinges or latches if needed. Large panels can be easier and safer to handle with a helper, so teaming up can make the process quicker and less stressful. By following each step carefully, your DIY shed will come together efficiently and provide a strong, practical and attractive storage solution for your yard.
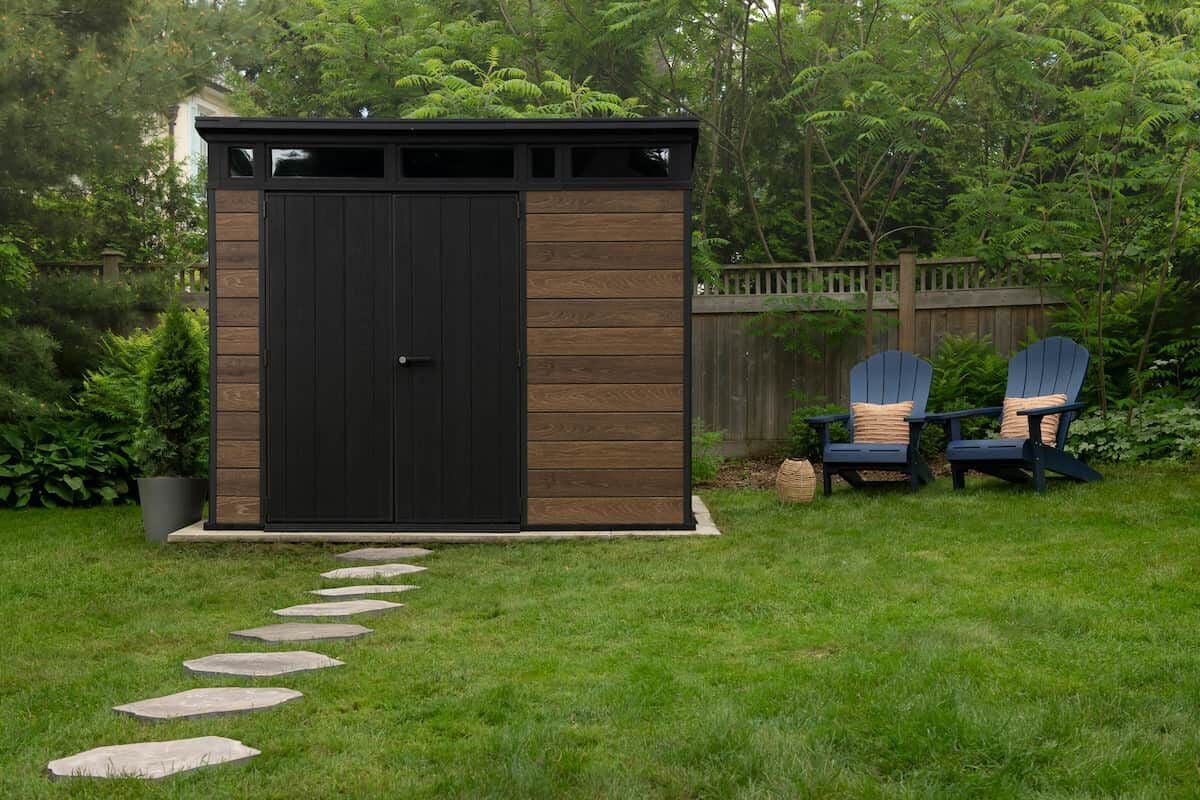
Step 7: Add Shelving and Organizers
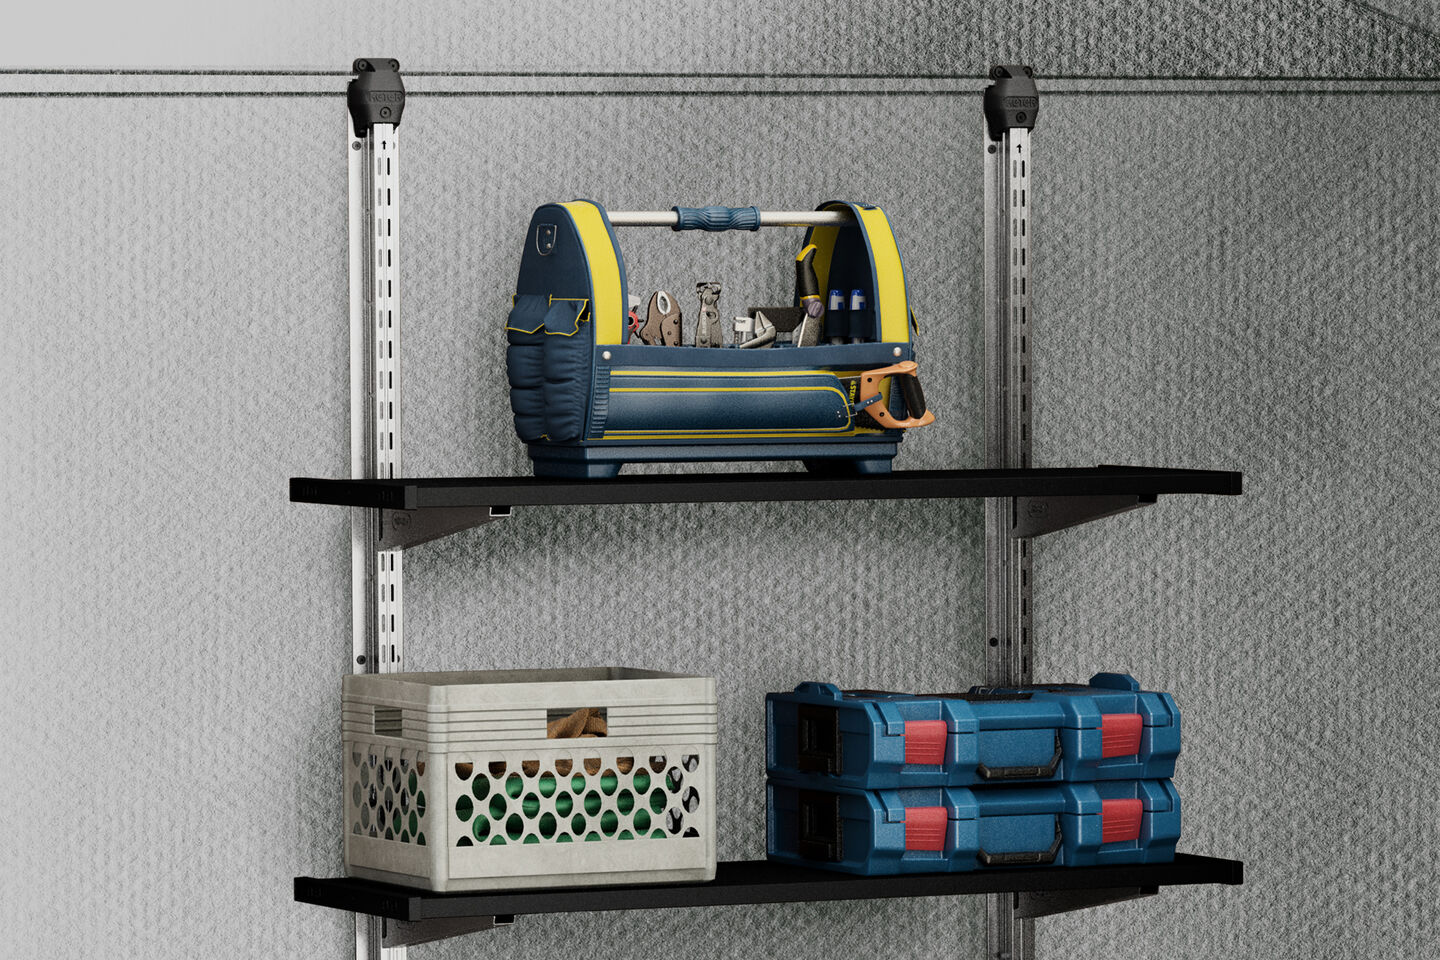

Once your kit garden shed is fully assembled, it’s time to make the most of the space inside. Keter offers durable shelving kits that fit neatly in your shed, helping to keep tools, gardening supplies and other items organised. Choose a shelving kit that works with the layout of your shed and install it following the included instructions. Position shelves at the height you need and make sure they are level and securely anchored to the walls.
Adding extra storage options like tool racks can help use vertical space efficiently, keeping everything within easy reach and freeing up floor space. This approach turns your DIY shed into a tidy, well-organized storage solution that makes it easy to find what you need when you need it.
Keter’s resin shed kits are built to last. Made from weather-resistant resin, they won’t rot, rust or peel, and their low-maintenance design keeps them looking great year after year. With easy-to-follow instructions, assembling your shed is straightforward, giving you a reliable, attractive storage space without the hassle of traditional construction.
A shed kit like this can help keep your yard clutter-free and provide a practical, long-lasting solution for all your storage needs.
Frequently Asked Questions
How to Build a Shed
Do I need a permit to build a shed in Canada?
How long does it take to build a shed kit?
What tools do I need to assemble a shed?
How do I make sure my shed lasts through Canadian weather?


We build in a sustainable manner.
We use innovative technologies and sustainable materials to build planet-friendly products that last a lifetime.